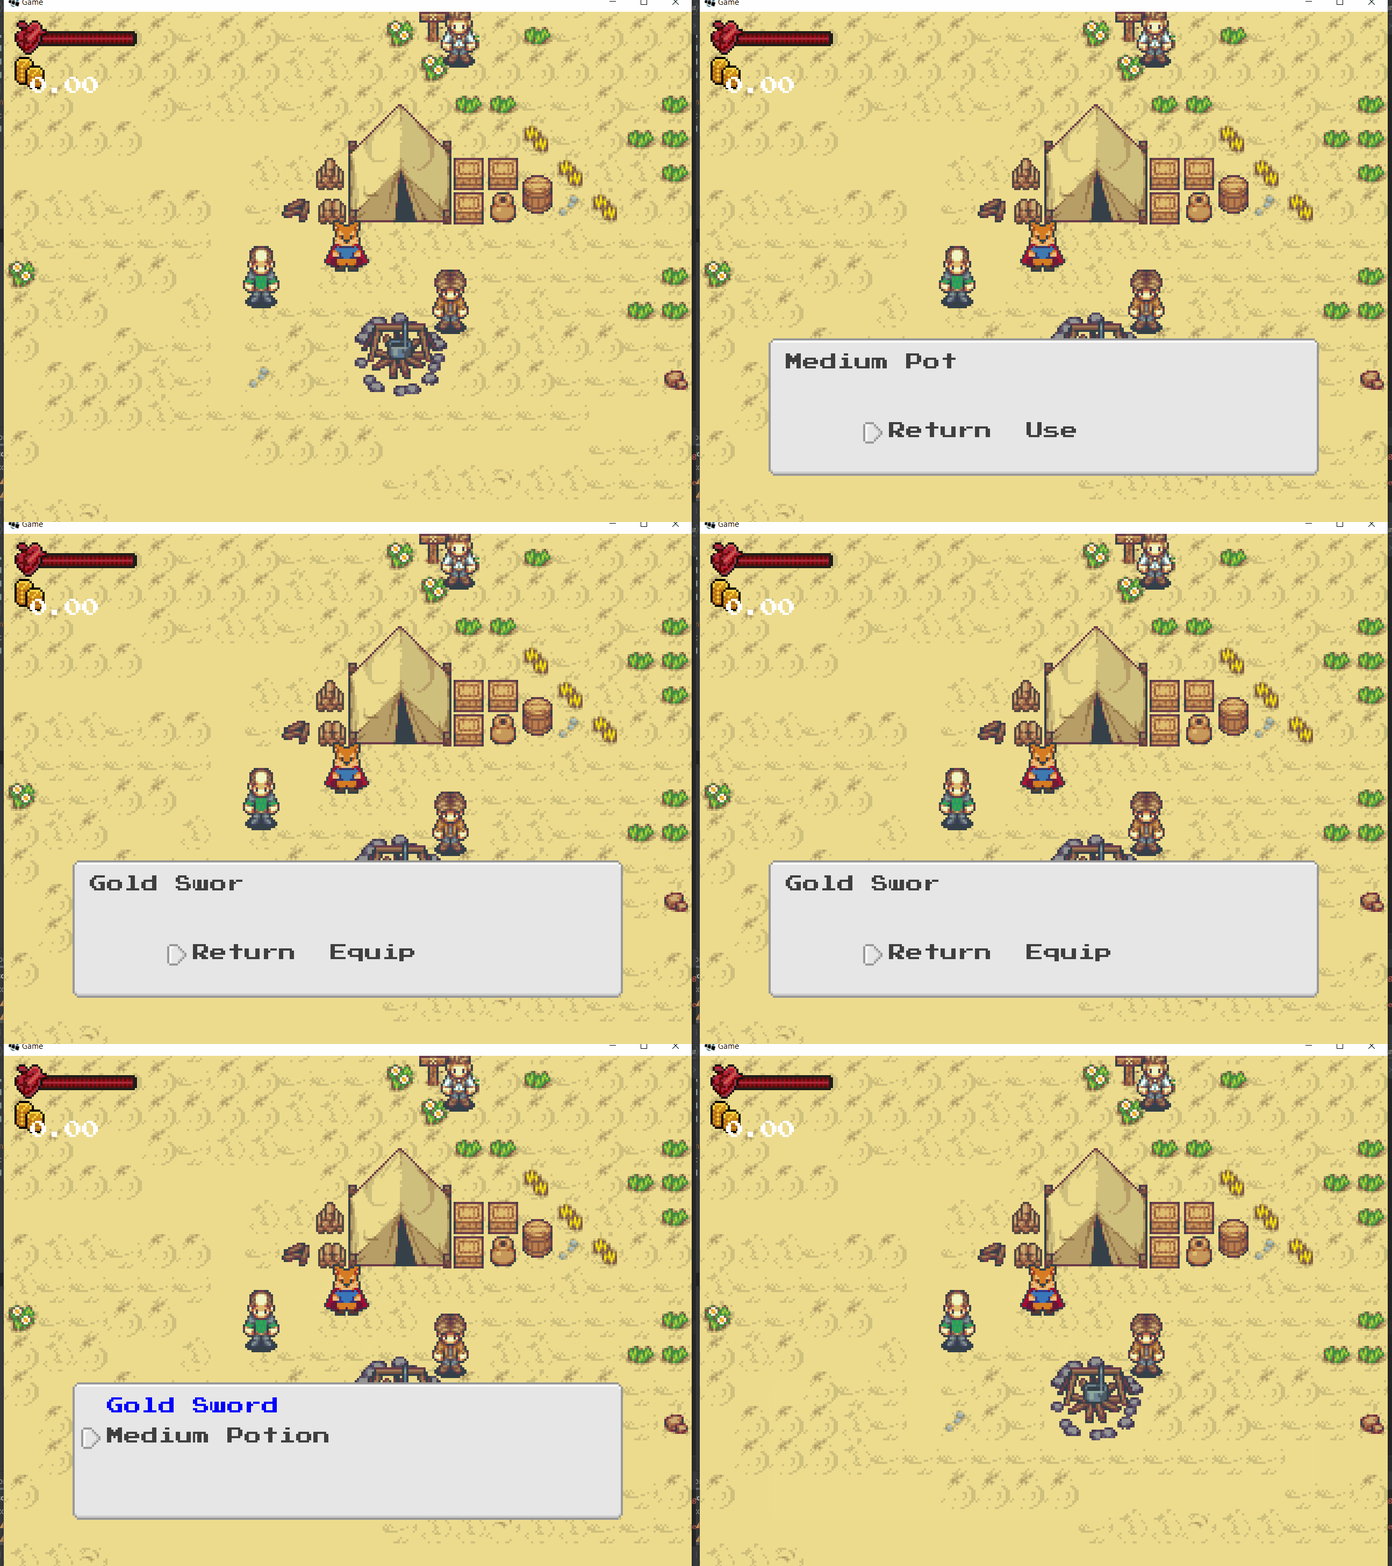
13.3. Inventaire
La dernière étape consiste à donner un moyen au joueur d'utiliser un item de son inventaire. Nous aurons recours à une seconde fenêtre de dialogue permettant d'interagir avec l'objet sélectionné.
Étapes à suivre
- ajoutez la classe
ItemDialog- chargez la texture
arrow_side.pngque nous avons utilisé pour l'inventaire.- à l'intérieur de la méthode
updateon permet au joueur d'accepter ou refuser l'interaction avec un 'item
- Ce mécanisme permettre de réutiliser cette fenêtre de manière générique
- à l'intérieur de la méthode
render, nous calculons la position des options
- Selon l'option sélectionnée, nous affichons le curseur au bon endroit.
/* ItemDialog.java */
package com.tutorialquest.ui.dialogs;
// import ..

public abstract class ItemDialog extends Dialog {

    public static final String ITEM_TEXT = "%s";

    protected Item item;
    private Texture selectionTexture;
    private boolean isAcceptSelected = false;

    protected abstract String getAcceptText();
    protected abstract String getCancelText();
    public abstract void acceptItem();

    protected String getItemText() {
        return String.Format(ITEM_TEXT, item.name);
    }

    public boolean isAvailable()
    {
        return true;
    }

    public ItemDialog() {
        super();
        selectionTexture = new Texture("ui/arrow_side.png");
    }

    public void open(Item item)
    {
        open();
        this.item = item;
        reset(getItemText());
    }

    @Override
    public void update(float deltaTime)
    {
        if(!enabled) return;

        super.update(deltaTime);

        // Sélection de l'option (accepter, refuser)
        if(currentTextProgress >= currentTextLength - 1)
        {
            if(Game.hud.input.isLeftJustPressed()) isAcceptSelected = !isAcceptSelected;
            else if(Game.hud.input.isRightJustPressed()) isAcceptSelected = !isAcceptSelected;
            else if(Game.hud.input.isInteractJustPressed())
            {
                // Confirmation de l'option et interaction
                if(isAcceptSelected)
                {
                    if (isAvailable()) {
                        acceptItem();
                        close();
                    }
                }
                else close();
            }
        }
    }

    @Override
    public void render(
        SpriteBatch spriteBatch,
        Vector2 position)
    {
        if(!enabled) return;

        super.render(spriteBatch, position);

        Vector2 cancelPosition = new Vector2(
            position.x + (WIDTH*.25f - MARGIN),
            position.y + (HEIGHT/2 - MARGIN)
        );

        Vector2 acceptPosition = new Vector2(
            position.x + (WIDTH*.5f - MARGIN),
            position.y + (HEIGHT/2 - MARGIN)
        );

        // Cancel
        spriteBatch.begin();
        font.draw(
            spriteBatch,
            getCancelText(),
            cancelPosition.x,
            cancelPosition.y,
            (WIDTH - MARGIN * 2),
            Align.left,
            true);
        spriteBatch.end();

        // Accept
        spriteBatch.begin();
        font.setColor(
            isAvailable() ?
                Color.DARK_GRAY :
                Color.GRAY
                );

        font.draw(
            spriteBatch,
            getAcceptText(),
            acceptPosition.x,
            takePosition.y,
            (acceptPosition - MARGIN * 2),
            Align.left,
            true);
        font.setColor(Color.DARK_GRAY);
        spriteBatch.end();

        Vector2 selectedPosition = isAcceptSelected ? acceptPosition : cancelPosition;

        // Draw sélection arrow icône
        spriteBatch.begin();
        spriteBatch.draw(
            selectionTexture,
            selectedPosition.x - ICON_SIZE,
            selectedPosition.y - (ICON_SIZE*.75f),
            ICON_SIZE,
            ICON_SIZE);
        spriteBatch.end();
    }
}
Étapes à suivre
- ajoutez la classe
InventoryItemDialogqui permet l'interaction spécifique avec un objet de l'inventaire- modifiez le texte afin de différentier l'utilisation d'un item de type Equipement par rapport à un item de type Consumable
- modifiez la classe
InventoryDialogafin de représenter lorsqu'un item de type Equipement est équipé
/* InventoryItemDialog.java */
package com.tutorialquest.ui.dialogs;
// import ..

public class InventoryItemDialog extends ItemDialog {

    public static final String USE_TEXT = "Use";
    public static final String EQUIP_TEXT = "Equip";
    public static final String UNEQUIP_TEXT = "Unequip";

    public String acceptString;

    public InventoryItemDialog() {
        super();
    }

    @Override
    protected String getCancelText()
    {
        return "Return";
    }

    @Override
    protected String getAcceptText()
    {
        return acceptString;
    }

    @Override
    public void acceptItem()
    {
        item.use(Game.level.avatar);
    }

    @Override
    public void open(Item item)
    {
        super.open(item);

        if(item.type.equals(Item.TYPE_EQUIP)) acceptString = Game.level.avatar.isEquipped(item) ? UNEQUIP_TEXT : EQUIP_TEXT;
        else acceptString = USE_TEXT;
    }
}
/* InventoryDialog.java */
package com.tutorialquest.ui.dialogs;
// import ..
public class InventoryDialog extends Dialog {
@Override
public void render(
SpriteBatch spriteBatch,
Camera camera,
Vector2 position)
{
// ...
for(int i = offset; i < offset + MAX_VISIBLE_ITEMS; i++)
{
// ...
spriteBatch.begin();
// AJOUT:
// Affichage de l'item en bleu, lorsque il est équipé
if(Game.level.avatar.isEquipped(item)) font.setColor(Color.BLUE);
font.draw(
spriteBatch,
item.name,
startPosition.x,
startPosition.y - offsetHeight,
(WIDTH - MARGIN * 2),
Align.left,
true);
font.setColor(Color.DARK_GRAY);
spriteBatch.end();
// ...
}
// ...
}
}